
To create a community landing page, click Social on the top navigation menu and select the Manage Communities option.

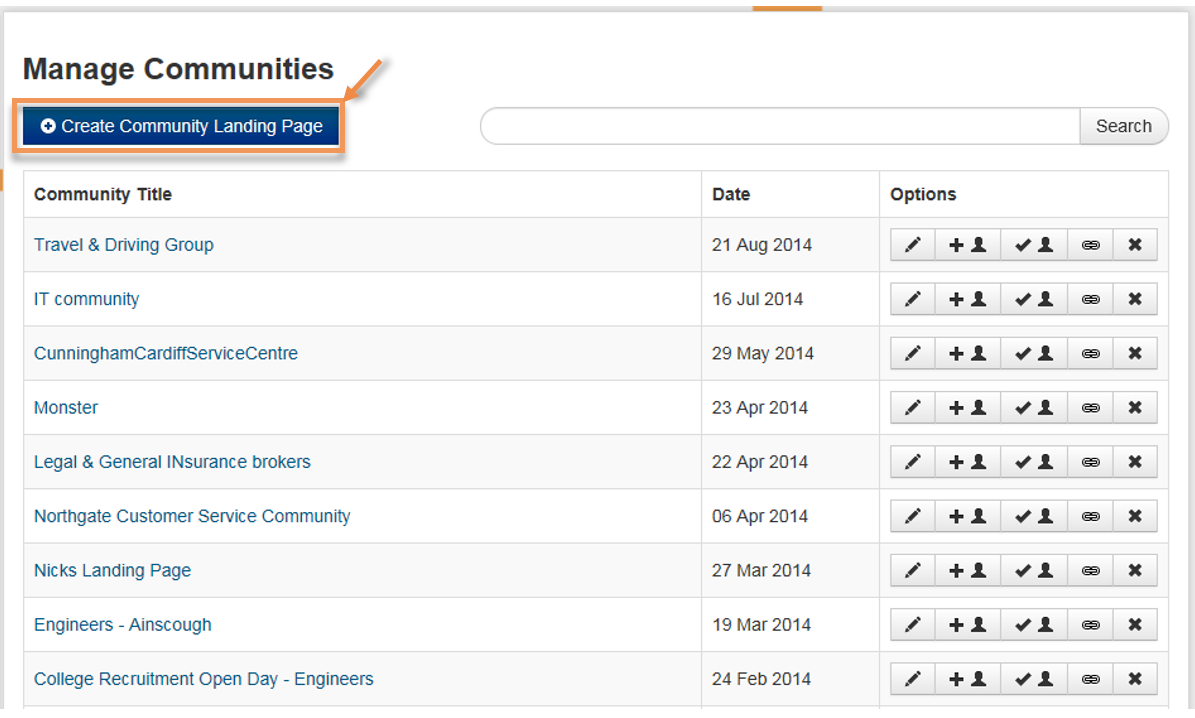
This will display the Manage Communities screen, listing all your communities in date descending order.
Click on the Create Community Landing Page button to open the Create Community Landing Page.
Add a Logo
Click on the ‘Upload logo’ to upload an image (max 150px x 90px). If you want to remove the logo, click on the x button. To change the logo, click Edit:
Community Title
Type into the text box to add a title:

Landscape Images
Click on the ‘Upload landscape image’ to upload an image (max 205px x 110px). If you want to remove the image, click on the x button. To change the image, click Edit:
Body text
Type into the text box to create the body text. Use the formatting options if you wish to format the text
Add a Questionnaire
Add a questionnaire to your community landing page – this might be useful if you’re keen to collect candidate or employee information from anyone landing on your page –
To find out how to create a questionnaire, please see the separate section within this manual – when it’s saved to your questionnaire bank, you can pick up the community and continue.

Assign Groups
To automatically subscribe users to groups when they join the community, select the user-types (Job seekers, recruiters, etc.) then select the groups by ticking the checkboxes. You can remove groups and users by un-ticking the checkboxes.

You can create a new group by clicking the + Create new group button and entering the following information:
- Group Name: Type to enter text (required)
- Group Visibility: Select the appropriate radio button (required)
- Description: Type to enter text (up to 500 characters) (required)
- Groups available to the following users: Select the appropriate checkboxes (required)
- Allow Comments? Select the appropriate radio button
- Allow Jobseekers to create threads: Select the appropriate checkboxes (required)
- Allow File uploads: Select the appropriate radio button
- Group Photo: Click the Browse… button to upload an image(up to 2mb)

Click the Create group button to save your changes:
![]()
For more information about groups, see About Groups.
Assign Tags
To automatically assign tags to users when they join the community, select the relevant tags by ticking the checkboxes. You can remove tags by un-ticking the checkboxes. The benefit of tagging your community members is that you can clearly see (through searching ‘tags’/talent pools) within your candidate database, who is a member.

To filter tags, type the search term in the Filter text box. In this example, tags have been filtered to those containing the term ‘tr’:

To create a new tag, type the tag into the Create tag textbox and click the + Add button:

The tag will be added to the list of existing tags and automatically selected.
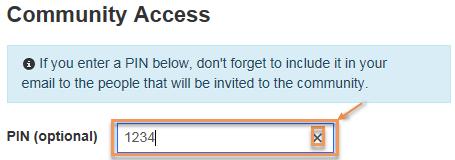
Community Access
This section can be used to add additional security to the community.
You can assign a PIN number to the community to only allow users that have been given the PIN to join. You can add or amend a PIN by typing in the box:
Delete a PIN by clicking the x.
To only allow invited people to join the community tick the checkbox:

For more details on sending invitations, see the section below.
Remove the tick to allow any user to join the community.
NOTE: if this box is ticked and an invite is sent to users not registered on your Tribepad database these users will not be permitted access. Therefore, leave this option empty if you want to allow anybody without a Tribepad account to join the community.
Buttons

Click the < Back button to return to the Manage Communities screen without saving your changes.
Click the Preview button to view a preview of the community landing page (click X to close the preview).
Click the Save Only button to save the changes and return to the Manage Communities screen.
Click the Save and go to invite people > button to save the changes and proceed to inviting people to join the community (section below for more details).
Invite people to join a community
If you select the Save and go to invite people > option an Email content screen will be displayed. From here, you can create an email to send to the users you wish to invite to join the community.
Email content
An example of an email will be displayed in the subject and content email content boxes. You can use this content, or amend as required.
To amend, simply type in the subject and content text boxes. Use the formatting options to format the content text:
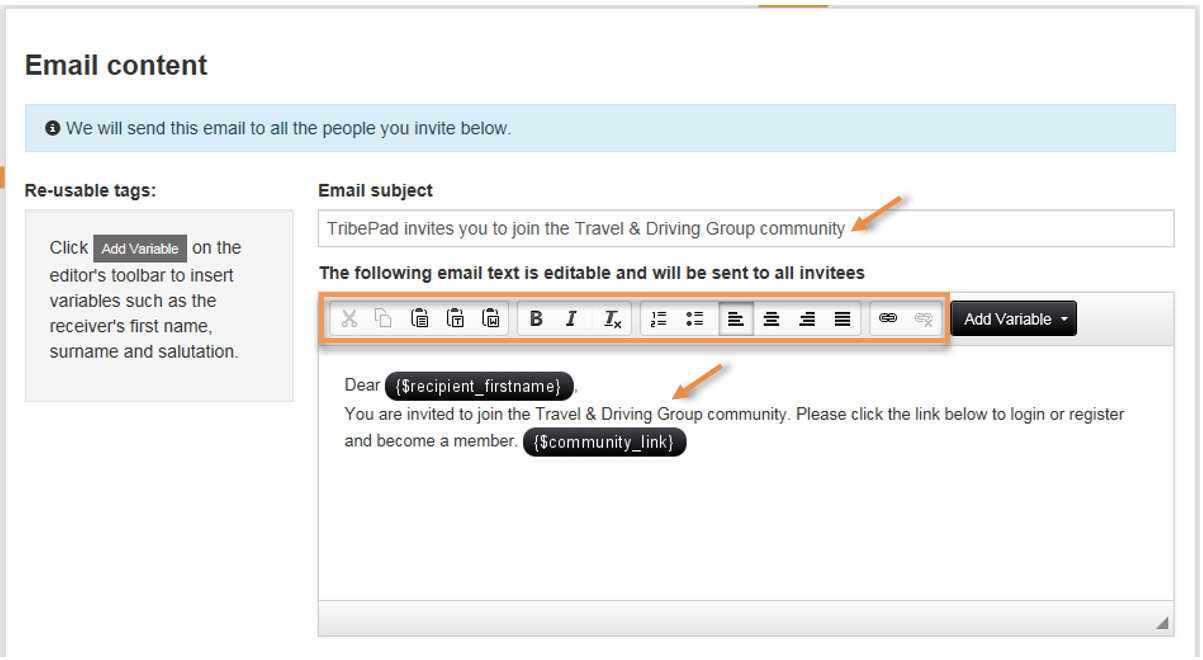
You can also use variables to personalise the wording of the email e.g., first name, salutation, link to community. Insert variables by clicking on the Add Variable dropdown and selecting the required options from the list:

When these variables are used they will be replaced in the email with each recipient’s salutation, first name, surname or the link to the community landing page. The variables can be used as many times as required.
Invite people to join this community
Recipients for the email can be added either manually or by uploading a .csv file.
Manually select users
To select users, firstly click the user group you wish to add:

This will open a pop-up enabling you to search and select users from the user group.
When choosing to search for candidates, this will open the CV Search functionality. For more details on how to search and select candidates, see Search CVs for candidates.
When choosing to search for hiring managers, a similar screen will be displayed, but without candidate specific options.
When users are selected, they will be added to the selected candidates box. If you want to remove users, simply click the x located on each user name:

When you are happy with the selected users, click the Add selected candidates button:

Alternatively, you can exit without saving your selections by clicking x Cancel or the X located at the top right of the pop-up.
When users are selected the pop-up will be closed and the users will be listed under the Added people: heading. If any users cannot be added to the list, a notification will be displayed.
.
If you want to remove users, simply click the x located on each user name.
Upload file of candidates
You can upload a .csv file containing a list of recipients for the email. This method can be used to invite people not registered on your Tribepad database. For example, you could add a list of prospective candidates gathered from a recruitment fair.
Click on the Download file of candidates example button to open an example file that can be amended with the list of your recipients:

Save the file, then upload by clicking on the + Upload file of candidates (.CSV) button.

Send community invite
When you are happy with the list of email recipients, simply click the Send community invite > button.
Click the <back button if you wish to return to the Manage Communities screen without sending the invite.

Summary of invited people
When the invite is sent, the Summary of invited people screen will be displayed with a confirmation message. Click on a username if you wish to view their overview. Hover the mouse over the icon at the top right of each user name to display more details:

Click the Go to communities dashboard > button to return to the Manage Communities screen.
If you wish to invite more users, click the <back button.